Back in late January/February, I went on a jeans-making spree and made four pairs in one month. I had a lot of fun trying out different techniques and hacking patterns to create my perfect pair. You know I love to get out the heavy-duty tools while sewing (hammer! pliers! nails! - oh my!), and top stitching is enormously satisfying, so once I got started making jeans, it was hard to stop.
I made a couple pairs using the Angela Wolf Angel Bootcut prior to this jeans-tornado, and while I was really happy with the fit, I wanted to see what I thought of the high-waisted style. I started with Ginger Jeans by Closet Case Patterns, because I've been happy with her patterns in the past, and her instructions generally seem very intuitive to me. I also wanted to give Baste & Gather's Birkin Flares a go.
What I learned
1) You gotta get the correct crotch curve. The Angela Wolf Angel Bootcut is more of a J-shaped curve (gentle slope), and the Ginger Jean is more of a L-shaped cover (like a piece has been scooped out). The first pattern I tried was AW, and luckily that really worked for me. StyleArc uses a curve similar to Closet Case, and I was never happy with the way these pants looked from behind (a view I don't see much, but others, like my DH, have told me). I have a high butt, narrow hips, and the distance from my waist to hip is on the short side. If that describes your body shape, you might need a similar crotch curve. On the Ginger pattern, this means I have to add a patch before I cut - I imagine this would be difficult to fix once the fabric is cut.


Oh! And pocket placement matters! The Angels were pretty good out of the box but I had to move the Gingers up and in about an inch.
2) Check your crotch length (wow, that sounds personal). I needed to shorten the crotch length in front. I didn't notice this with my first few pairs of jeans because it wasn't too far off, but I have certainly noticed this with RTW pants. This adjustment is super easy. I made this adjustment after the gray Gingers, and I think you can see the different on the dark blue and black Gingers.


3) I like tight but not too-tight. I knew that the Birkin Flares would be tighter than what I had made before but I wanted to see what I thought of something with negative ease. I've only worn this pair of jeans two-tree times since I made them, and only as "going-out-with-heels" jeans, never during the day. I feel a little self-conscious about the tightness, but my husband loves them, so they will likely stay in my closet.


4) Find the fly front technique that works for you. Sewing a fly front is not as difficult as you might expect - it's just a series of steps. I've now tried three basic methods: Angela Wolf (Baste & Gather uses the same or very similar method), Closet Case Patterns, and Silhouette Patterns (one of my students sewed a pair in class). Silhouette patterns' method is definitely the easiest, but I found I preferred the method that Closet Case teaches. It just clicked with my way of thinking and I got the most consistent results using her method.
5) Get the good fabric. I made my first pair from some random denim in my stash, and it didn't hold up well. I got about a year out of those jeans, and after putting in the effort to make them, I want them to last longer than that. I bought some Cone Denim in a Closet Case kit and it is fabulous - great weight, recovers well (I can wear a pair for more days than I care to admit without bagging), and it distresses well if you are into that. Cone Mills I also available at Threadbare. and I just bought some beautiful denim in the Gorgeous Fabrics sale. I made my black pair out of high quality denim from Marcy Tilton - a birthday present from DH - how did he know? ;). You can't see it in the photos, but it has a slight giraffe print to it.
6) Find the leg shape/leg length that works for you. I first cut my Gingers full length, but somehow they never looked right to me and I thought I just wasn't a skinny-leg-jean person. Then I rolled them up and it changed the looked completely, so I went back and hemmed them at ankle length. I'm sure that there is some visual trick that explains this (I suspect that full length skinny jeans are off balance on someone whose widest point is her shoulders), but it was helpful to see that something simple like hem length completely saved these jeans for me. I gravitate towards boot cuts & flares, but it's good to know that I can make skinny work.
7) Have fun with your pocket linings! I have a lot of quilting cotton scraps and I love having fun with these on the pocketses.

You'll see that I don't use traditional jean buttons for the jeans. I have done, and I like those, but I also like playing around with other metal buttons. And I don't like having traditional jean buttons on my back pockets - too pokey! I purchased these from Angela Wolf's shop (I don't think she sells them anymore) and Wawak.com. And I found some cool metal buttons on eBay that I'm excited to use.
If you haven't tried making your own jeans, I highly recommend giving it a go. It's enormously satisfying work, and getting that perfect fit is worth it. It takes me 6-8 hours to sew a pair now that I have the fit worked out, depending on how much distressing I do along the way. I followed Angela Wolf's Craftsy course the first time I made a pair, and it was very helpful. Closet Case also has a great sewalong, and I bet her class is fantastic. Sew on!
I made a couple pairs using the Angela Wolf Angel Bootcut prior to this jeans-tornado, and while I was really happy with the fit, I wanted to see what I thought of the high-waisted style. I started with Ginger Jeans by Closet Case Patterns, because I've been happy with her patterns in the past, and her instructions generally seem very intuitive to me. I also wanted to give Baste & Gather's Birkin Flares a go.
 |
| Angela Wolf Angel Bootcut jeans StyleArc Jett Jacket and Jalie Twist top |
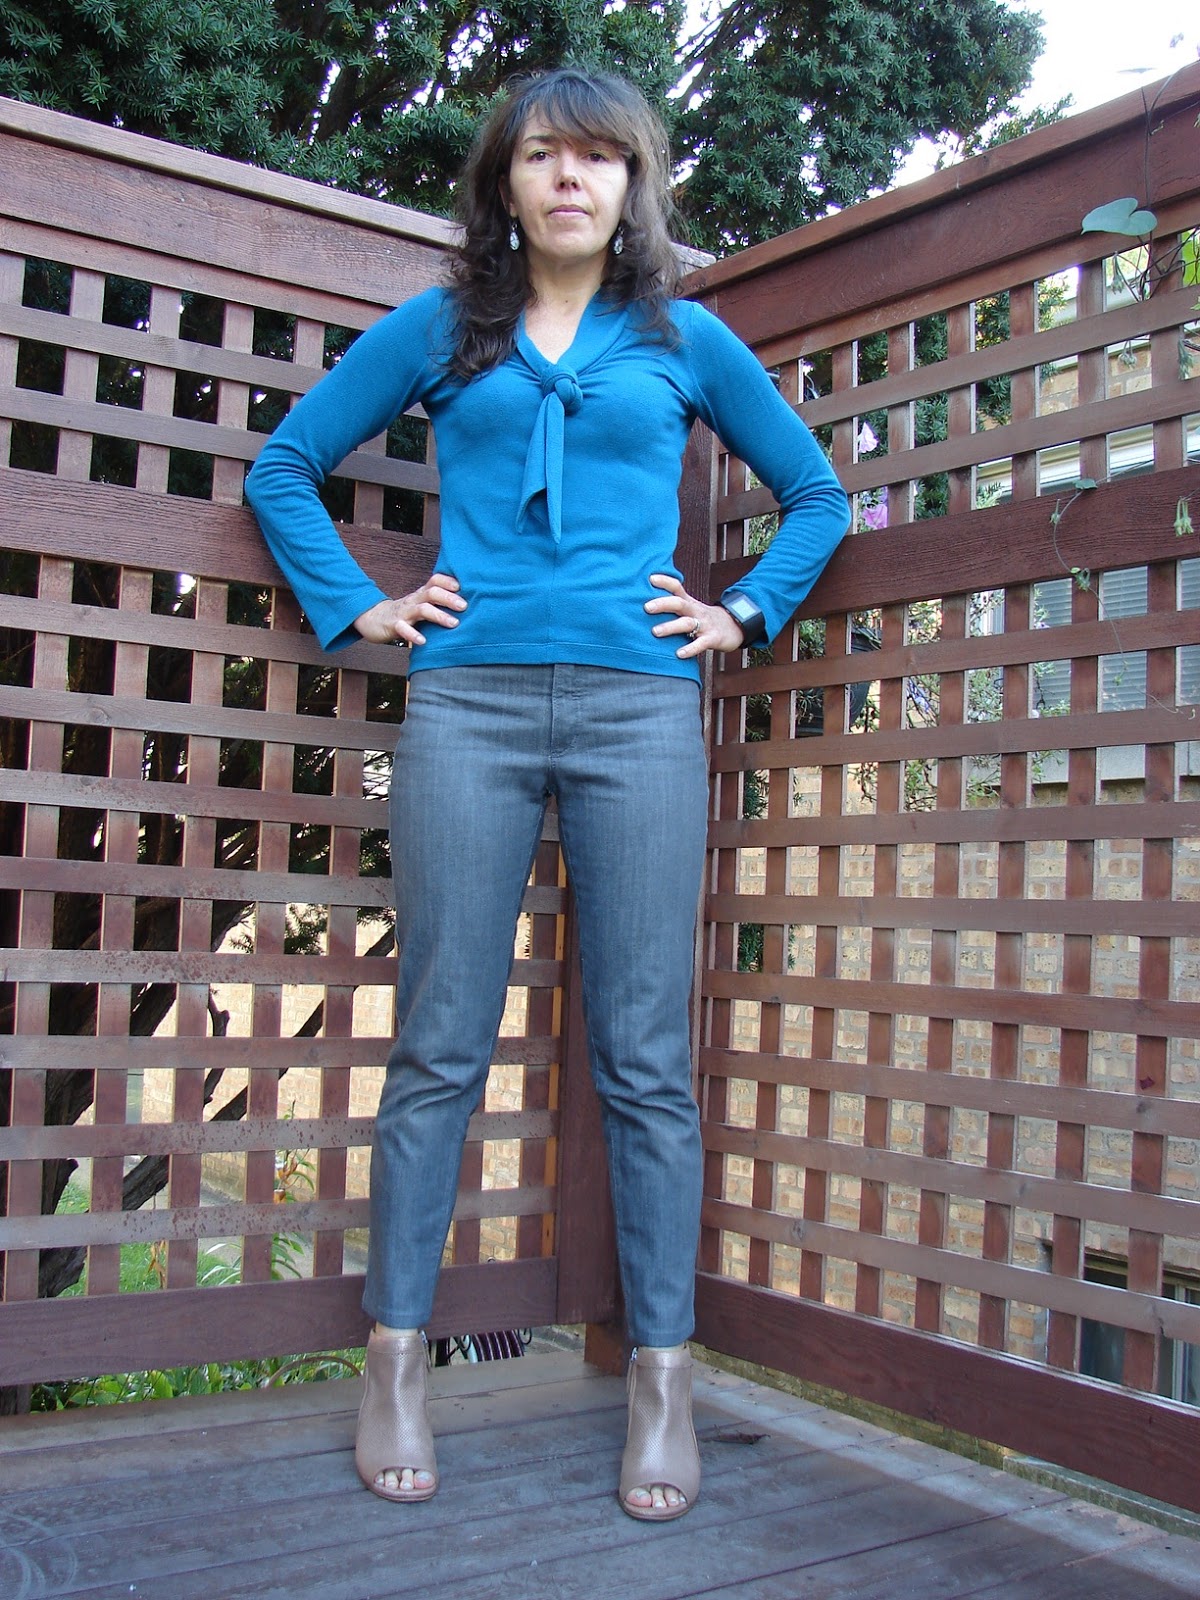 |
| Closet Case Ginger jeans Jalie tie top |
 |
| Closet Case Ginger jeans |
 |
| Baste & Gather Birkin Flares |
 |
| Ginger + Angel (Ginger waist/butt, Angel legs) StyleArt Jett Jacket, color block Jalie Twist top |
What I learned
1) You gotta get the correct crotch curve. The Angela Wolf Angel Bootcut is more of a J-shaped curve (gentle slope), and the Ginger Jean is more of a L-shaped cover (like a piece has been scooped out). The first pattern I tried was AW, and luckily that really worked for me. StyleArc uses a curve similar to Closet Case, and I was never happy with the way these pants looked from behind (a view I don't see much, but others, like my DH, have told me). I have a high butt, narrow hips, and the distance from my waist to hip is on the short side. If that describes your body shape, you might need a similar crotch curve. On the Ginger pattern, this means I have to add a patch before I cut - I imagine this would be difficult to fix once the fabric is cut.
 |
| The green line is the original on the Ginger. I traced the magenta line off the AW pattern, which is what works for me. Big difference! |


Oh! And pocket placement matters! The Angels were pretty good out of the box but I had to move the Gingers up and in about an inch.
2) Check your crotch length (wow, that sounds personal). I needed to shorten the crotch length in front. I didn't notice this with my first few pairs of jeans because it wasn't too far off, but I have certainly noticed this with RTW pants. This adjustment is super easy. I made this adjustment after the gray Gingers, and I think you can see the different on the dark blue and black Gingers.


 |
| Green line is original, magenta is adjustment. |
 |
| Green line is original, magenta is adjustment. |
3) I like tight but not too-tight. I knew that the Birkin Flares would be tighter than what I had made before but I wanted to see what I thought of something with negative ease. I've only worn this pair of jeans two-tree times since I made them, and only as "going-out-with-heels" jeans, never during the day. I feel a little self-conscious about the tightness, but my husband loves them, so they will likely stay in my closet.


4) Find the fly front technique that works for you. Sewing a fly front is not as difficult as you might expect - it's just a series of steps. I've now tried three basic methods: Angela Wolf (Baste & Gather uses the same or very similar method), Closet Case Patterns, and Silhouette Patterns (one of my students sewed a pair in class). Silhouette patterns' method is definitely the easiest, but I found I preferred the method that Closet Case teaches. It just clicked with my way of thinking and I got the most consistent results using her method.
5) Get the good fabric. I made my first pair from some random denim in my stash, and it didn't hold up well. I got about a year out of those jeans, and after putting in the effort to make them, I want them to last longer than that. I bought some Cone Denim in a Closet Case kit and it is fabulous - great weight, recovers well (I can wear a pair for more days than I care to admit without bagging), and it distresses well if you are into that. Cone Mills I also available at Threadbare. and I just bought some beautiful denim in the Gorgeous Fabrics sale. I made my black pair out of high quality denim from Marcy Tilton - a birthday present from DH - how did he know? ;). You can't see it in the photos, but it has a slight giraffe print to it.
6) Find the leg shape/leg length that works for you. I first cut my Gingers full length, but somehow they never looked right to me and I thought I just wasn't a skinny-leg-jean person. Then I rolled them up and it changed the looked completely, so I went back and hemmed them at ankle length. I'm sure that there is some visual trick that explains this (I suspect that full length skinny jeans are off balance on someone whose widest point is her shoulders), but it was helpful to see that something simple like hem length completely saved these jeans for me. I gravitate towards boot cuts & flares, but it's good to know that I can make skinny work.
7) Have fun with your pocket linings! I have a lot of quilting cotton scraps and I love having fun with these on the pocketses.

You'll see that I don't use traditional jean buttons for the jeans. I have done, and I like those, but I also like playing around with other metal buttons. And I don't like having traditional jean buttons on my back pockets - too pokey! I purchased these from Angela Wolf's shop (I don't think she sells them anymore) and Wawak.com. And I found some cool metal buttons on eBay that I'm excited to use.
If you haven't tried making your own jeans, I highly recommend giving it a go. It's enormously satisfying work, and getting that perfect fit is worth it. It takes me 6-8 hours to sew a pair now that I have the fit worked out, depending on how much distressing I do along the way. I followed Angela Wolf's Craftsy course the first time I made a pair, and it was very helpful. Closet Case also has a great sewalong, and I bet her class is fantastic. Sew on!


Post Comment
Post a Comment