The thoughts, sewing projects, and fabric oglings of a dedicated sewist.

What's Up: End of Preschool

5/30/12
I'm behind this week - I took the holiday off and we had friends over for a BBQ.  Then I was up all night Monday night with a vicious migraine (nausea and more, unable to sleep, almost told Devon he needed to get me to the ER) so Tuesday was about taking it easy and recovering (and calling my doctor to cry uncle and ask for a prescription).  But I'm back on track and feeling like myself again.  I will head out the door in a moment to go lead Cora's farewell class party - my baby is done with preschool - but I thought I'd take a moment to post about her teachers and the farewell gifts I made.

Miss Kim and Miss Nancy are fantastic teachers.  They have big hearts and big personalities and they treat the kids like people, so with humor, kindness (without the treacle), patience, and the right lack of tolerance.  Cora has really blossomed at school this year.  She's still hesitant to give hugs to non-family members (you should see the look on her face when a classmate runs up to hug her!) but she's confident about talking to and playing with other little people now.  And just more of her has come out.  So I love these teachers.

I organized the gifts from the other parents and classmates and we're giving them some things for the classroom: The Sneaky Snacky Squirrel Game (we received this from our friends Kate, Candice, and Rowan for Christmas and it is awesome) and two favorite books, Bedtime for Bear by Bonny Becker and "Stand Back!" Said the Elephant, "I'm Going to Sneeze!" by Patricia Thomas.  I still wanted to get them something special from just our family, so I made these gifts (Cora helped pick out the fabric and buttons):


The little top is for Miss Kim's soon-to-arrive granddaughter.  I traced a 0-3 mo top that we had in storage and then cut it out and added the ruffly strips before sewing it up.  I used scraps from the top I made for my friend Malinda and I'm excited to find a use for the leftovers from my jersey projects!

I'll get you caught up on my other ongoing projects soon.  I made a jersey dress for myself, but I need to get pictures.  I did a ton of work on Catlin's summer wardrobe but everything is not quite done yet (waiting for a fitting), and I finished Johnah's skirt but I want to get a picture of her in it.  This week I will make some headway on Ann Marie's and Denise's skirts.  But for now I'll just soak up the end of preschool

What's Up: Marides' Skirt, Bangle Bracelet

5/22/12
Greetings!  I am going to make this post short and sweet as I've hired a babysitter today (and Thursday!) to get caught up on orders and I want to be as productive as possible with this time!

I finished up Marides' skirts this past week and I'm almost done with Johnah's.  I had some more fun matching prints across seams - this really is becoming a bit of an obsession for me.  Here are Marides' skirts:
A-line with Yoke - Joel Dewberry Tile Flourish in Amber fabric

I'm starting to feel like a pro when it comes to matching the print along the center back seam!

But matching the print along the front yoke was a challenge!
Bias trim skirt with navy twill and Amy Butler Fresh Poppies in Sky

Button & pocket detail

Side slit detail


I didn't have a lot of personal sewing time over the weekend but I did want to do a little something.  My friend Candice runs a wonderful blog called Candoodles, and every day she posts amazing tutorials that she has found or created.  Last week she posted a tutorial for making a rosette bracelet.  When I read the title I pictured something different from what the bracelet actually looked like. 


Rosette Bracelet from SewCraftCreate

It's a lovely bracelet, but I decided to make what I had pictured when I first read the title:


I used curtain fabric that I bought from a thrift store for wrapping the bracelet and making the rosettes (I just added the pink serged seam finish).  The bracelet came from the same thrift store.  I want to do more experimenting with this idea and I'm hoping I can score big on cheap bracelets at the Family Dollar Store this week.  And then I'll likely put together my own tutorial!

Wish me great productivity during my babysitter hours this week!

What's Up: Wallets and Rest

5/14/12
Whew, the Urban Crafter's Trunk Show is over.  It was good fun and a great learning experience.  I learned a lot more about what sells at these shows (items under $30) and what doesn't.  The best part was that I got to meet a group of lovely, creative ladies and I have some great connections going forward.  I was so tired at the end of the week that I didn't do any sewing over the weekend - not even the promise of a new skirt could lure me back to the sewing machine!

My main project last week was finishing up these wallets:


I'll be putting up the wallets and other items that didn't sell in my Etsy shop this week.  I'm glad to be able to stock it up again as it's been looking a bit empty!

There were so many great items at the show that I thought I'd highlight some of the things I liked best.

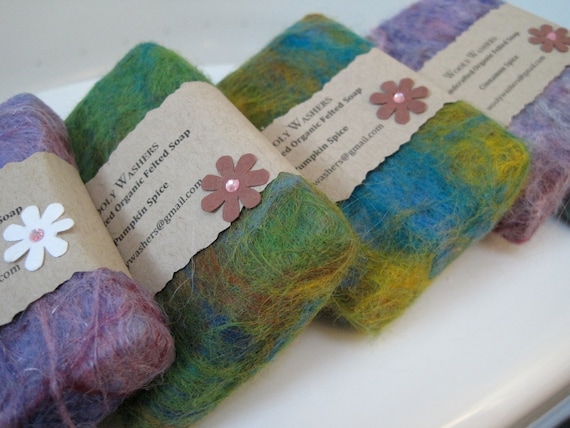
Berwyn Betty's Bath Shop
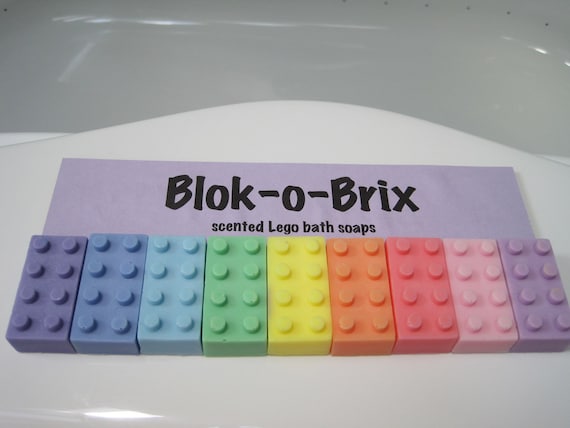
Stephanie Miller started Berwyn Betty about a year ago.  Stephanie started making soaps because she has a daughter with autism and one of her OCD behaviors is needing to use up an entire bar of soap in the shower no matter how long it takes.  After a lot of experimenting, Stephanie found that she doesn't do this with felted soap because she can't actually see the soap.  So Berwyn Betty became a way to make soaps and a future job opportunity for her daughter.  I bought a felted beer soap for myself and a set of her lego soaps for the girls.  The girls love them!

2 Pack Your Choice - Hand felted hand crafted soaps

BULK BUY - 5 blok-o-brix logs of 9 scented Lego soaps


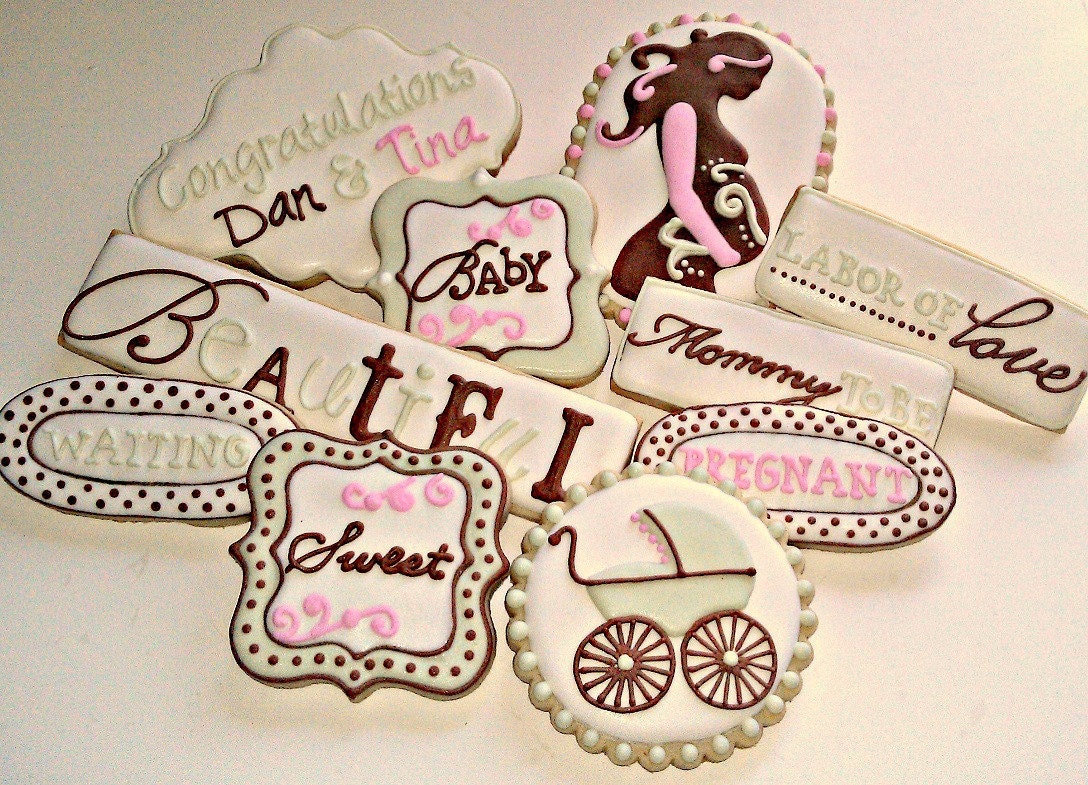
Custom Cookies by Jill
Jill Wagner is another Berwyn lady and she found her cookie calling when she needed to bring dessert to a party.  I am awed by how meticulous she is with her cookie designs: she projects an image onto the cookie to get the perfect shape and every color has to dry completely before she adds the next one.  All this for an item that will eventually be consumed!

Congratulations On Your Pregnancy Decorated Vanilla Almond Sugar Cookies


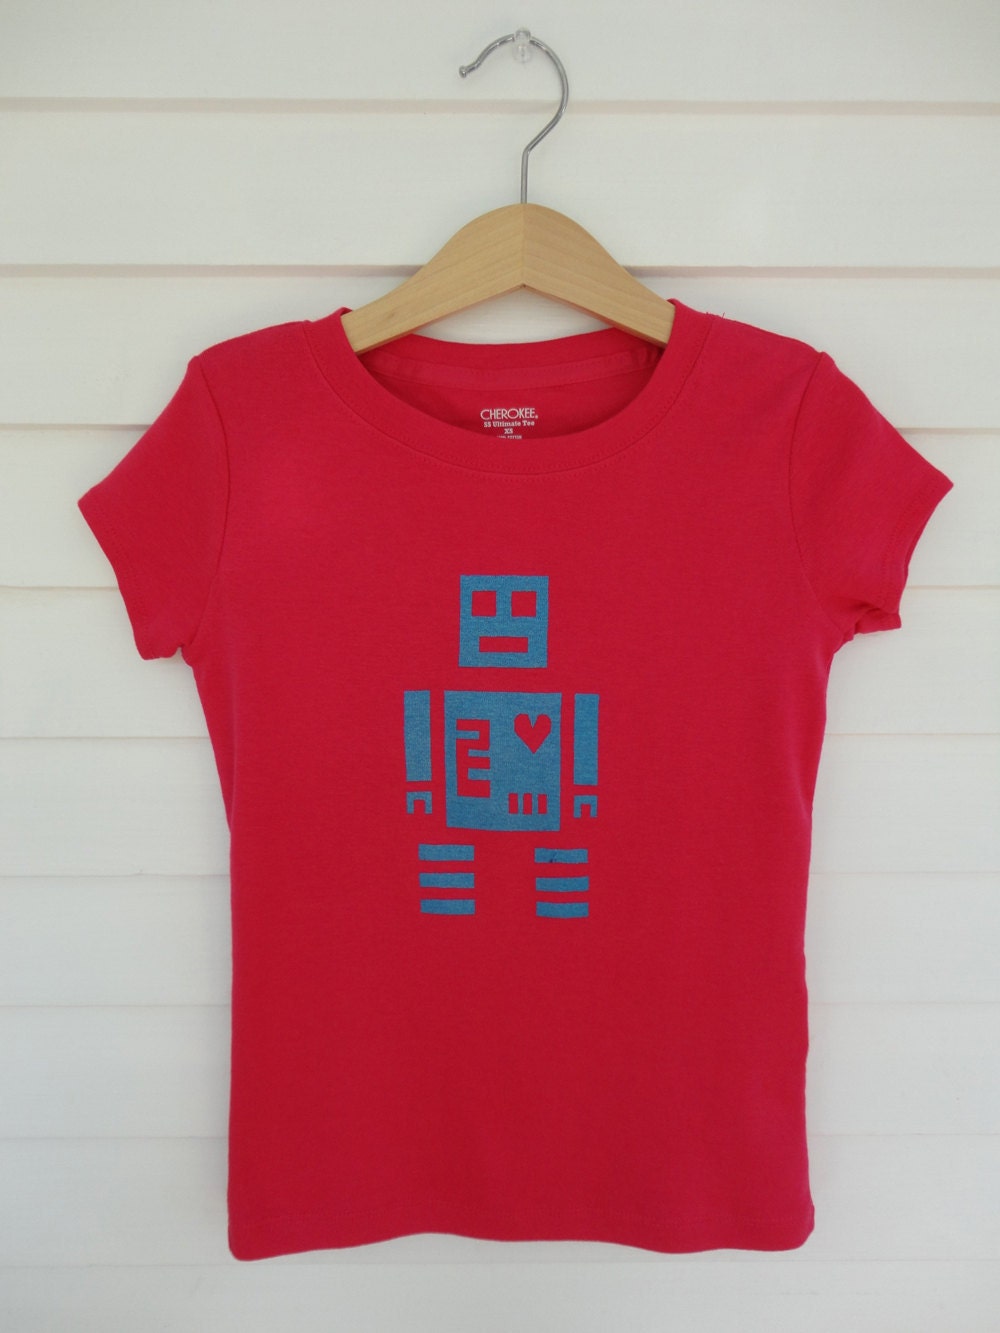
FormWork by Amy Struckmeyer
Amy makes anything and everything from pillows to bags to bracelets to t-shirts.  I particularly love her t-shirt designs and I was glad to read on her blog that she intends to start making them for grown-ups.

Girls Robot Love Screenprinted T-shirt -- Bright Pink


Alix Mikesell
Alix creates her jewelry out of unusual materials: laminate countertop and vintage swizzle sticks.  I loved almost every piece of jewelry that she had in the show.  Maybe (hint, hint) someone will buy a piece for me one day . . . .

Pinned Image

This week I plan to finish Jen's wallet and Johnah's skirt and hopefully have the time and energy to work on a skirt for myself next weekend!

Have a great week!

Urban Crafters' Trunk Show!!!

5/11/12
The day has almost arrived.  Maybe I am overly excited for the craft show, but so be it.  I'm not even primarily excited about the potential sales (although that would be nice); I am mostly excited about the experience of doing something with a group of other crafty ladies.  While I was working hard finishing up my wallets and handbags and tags and inventory list this week, I knew that there were a bunch of other ladies in Berwyn and Oak Park and River Forest doing the same thing, and it felt good.


Here's the info:  Saturday, May 12 from 9:30am - 5pm at 411 Park Ave in River Forest.  Liita owns this space and offers afterschool, weekend and summer classes to kids from age 6 & up that allow them to experience the joy and challenge of crafting, sewing, crocheting, and knitting.  I love love love the vibe of this place.  You can check out all the participants here and Liita's classes and camps here.

Now here's where I admit to an act of absolute dumbness.  I took a bunch of photos of how everthing looked in the space and completely forgot to take pictures of the six wallets I spend about 20 hours on over the course of the last few weeks.  And I didn't take any photos at home, either.  And they are super cool: upholstery swatches and scraps transformed into wallets where even the inside of the zippered coin pockets have their own statement to make.  Dumb, dumb, dumb, dumb, dumb.

I do have a picture of my flower pin display with my info scattered around it, so that will have to do.  And there are absolutely lovely things on sale that are NOT by PoldaPop tomorrow.  Take a look:

Aprons and owls t-shirts and various and sundry by Amy from Form Work

Cool soaps from Berwyn Betty . . . I think I will have to get some lego soaps for the girls

Felted soap from Berwyn Betty

My fabric scrap flower pins - notice the 15% off custom order vouchers . . .

Paula Knits


Apple Cozies from Liita of Little Bits

Jill Wagner from Custom Cookies by Jill (another Berwynite) also has some artsy cookies for sale.  I am floored by what she does to create these, and I wish I had a picture to show (another dumb moment - I'm going to blame my distraction on the fact that I had to wrangle a no-time-for-a-nap Maisey while I was setting up & taking pictures).  I'll be there from 11am - 1pm (and maybe later) so stop by and say hi!

What's Up: Work on Skirts, MaiseyBelle Reversible Bags, Flower Scrap Pins, Yet Another Cowl Neck Jersey Top

5/8/12
Greetings and Salutations!  I'm in the middle of finishing items for the Urban Crafter's Trunk Show on Saturday, so today's post is going to be fast and furious so I can get back to getting things together.

Marides' skirts are next on the list for client work.  The first skirt is one of my bias trim skirts and it is coming along nicely.  Marides chose navy twill with Amy Butler Midwest Modern II Fresh Poppise in sky, and the colors work well together:


Marides' second skirt is a yoked a-line from Joel Dewberry's Tile Flourish in Amber.  As the print is large and striking, I wanted to match the print across the center back seam and join it in a thoughtful way between the yoke and the skirt.  Everything was going well until I forgot to fold back out the center back seam allowance after matching the print so one half of the back was 1/2" wider than the other.  If you had been in my neighborhood you would have heard the long ARRRRGGHHH I let out.  I didn't have enough fabric to cut a new piece so I had to order more.  I tried to console myself with the knowlege that this is only the second time I've had to go out-of-pocket to fix a mistake, but it's still frustrating - especially since my mistake was so, well, dumb

Devon's aunt ordered another MaiseyBelle Reversible Bag for a friends' birthday (she's a great supporter - see my Seven Bags in Seven Days post) and since it only takes a bit longer to make two v. one, I made a second one for the show.  I still love this bag!


I've also been putting together some flower scrap pins to have a small, less pricey option on offer at the show.  These are easy because I can work on them at the kitchen table with the girls while they are doing crafts. 


One of the things I've learned about myself over the years is that I'm not very good at keeping a slow-and-steady pace.  I tend towards more of a go hard-crash-go hard-crash pace.  For a long time I thought that this was a flaw that I should fix, but I've learned that I'm much happier and more creative this way.  I have learned to see the crash coming so that I don't completely run myself into the ground so that it takes a whole week to recover.

And that's what I saw coming as I contemplated what projects to do this past weekend.  I wanted to do a corsetted pencil skirt - I want one for myself and it would be a good thing to have as a sample at the craft show - but it requires a level of effort and concentration that would have just sent me crashing into a pit of exhaustion.  So instead I did some mindless cutting out of wallet pieces and a couple of quick cowl neck tops (one for myself, one for a friend's birthday).  I changed things up a bit by adding a 6" band to the bottom of one top and contrast thread on the other:


And then I went out on the town with my friends Candice and Kristen for an evening of cocktails and laughter and stories.  Here I am posing with Cora and Maisey in my handmade outfit (and the girls wanted to get in on the action by also wearing things that I've made) as I head out the door:


I'll post later this week with more info on the trunk show and pictures of the set up.  Have a great week!

Free Sewing Tutorial: Draft a deep cowl neck top

5/3/12
UPDATE: I've added a post about drafting a facing for this cowl neck here.

My tutorial on drafting a high cowl neck top has had a lot of pageviews in the last week (this always makes me happy).  So at the request of at least one reader (see? that's all it takes with me!), I'll show you how to draft a cowl neck top starting with a pattern that has a dart.  This will produce a deeper cowl neck like this one:


I started with Silhouettes' Pattern #195 as I have already made alterations to the pattern for a good fit (changed shoulder slope, took in waist/hip as they are smaller size than my shoulders).  It has a French dart, but these instructions should work regardless of where you dart is placed.

And I need to give a big thank you to Peggy Sagers for her help in figuring out how to draft this pattern (from Silhouettes).  I took a couple of classes with her at the sewing conference I went to recently (Original Sewing and Quilting Expo) and she encouraged people to contact her with questions.  So when I was trying to figure out what to do with the dart, I emailed her.  Within a couple of hours I got a very helpful response.  And this was on a Sunday.

Materials
*1 - 1.5 yards of drapey fabric with stretch (jersey, knit, stretch charmeuse, maybe even stretch poplin)
*Tracing paper (I use Bienfang Canary Sketching and Tracing Paper, the 50 yard/24" roll)
*Clear ruler
*Top/bodice pattern with a dart


Step 1: Move dart to neckline.
Trace your orginal pattern onto another sheet of tracing paper as you'll need to do a lot of cutting.  To move the dart to the neckline, draw a straight line from the dart point to the center front neckline.


Now cut along this line until you are about 1/8" away from the dart point (this will be your "hinge"). 


Now close and tape the orginal dart which will cause the pattern to spread at the new dart point.  It should look like this:


All right!  Step 1 is done.  You have moved a dart!


Step 2: Cut & spread neckline
Draw a curved line under the neckline, 1.5 inches down from the original. Cut along this line until you are about 1/8 inch from the shoulder line.

Draw two lines that meet at a right angle on a new sheet of paper. Place your cut pattern piece along the top line on this piece of paper. Spread the neckline so that both points touch the top line. Angle the remaining bodice so that the bottom center front corner touches the side line. Tape into place.  If that sounds confusing, it isn't - I think it's just easier to understand with a picture:


Smooth out the angle created at the shoulder line:


(Please ignore the second layer of pattern - that was my first try and it wasn't correct so I just taped take 2 over the top.)

Step 2, check!


Step 3: Turn half pattern into full pattern
You need to cut on a bias for this design, so you will need a full instead of a half pattern. Take a big piece of tracing paper and draw a T with lines meeting a right angles. Trace your half cowl neck pattern onto one side of the T and then flip and trace it onto the other. It should look like this when you are done:


I know this looks like something that would never fit a human body, but trust me, it will work!  And please ignore the wide band in the middle - I had to tape two pieces of tracing paper together to get one that was big enough.

Good work - the hard parts are all done!

Step 4: Place and cut your fabric
Spread out your fabric. Place the front pattern piece on the bias and the back pattern piece on the straight grain. It will look like this:


Cut and sew the top as you would normally.  You can serge the edges, turn them under by 1/4" and topstitched them into place or leave them just serged for an edgier look  You can add any kind of sleeve or even a hem band.  This top will fit and look great.  Devon calls this my sexy top and looks suspicious when I wear it out with friends!


What's Up: Skirts for Bryn, New Upholstery Clutch, New Skirt Style

5/1/12
Another good week, although the sun faded as the week went on. The only nasty surprise was that I needed to make a surprise trip to the dentist when a piece of my tooth fell out while I was flossing.  Yes, flossing!  I sometimes feel like my teeth are laughing at me.

My main project of the week was finishing the skirts that Bryn ordered back in February at my last skirt party.  I got to make a gentle peplum for the second skirt - I really like these!


Bryn chose Circles in White on Black by Monaluna from Mingle for the top skirt (I love this fabric but it's almost impossible to find now) and Amy Butler's Lotus Wall Flower Lotus in Cherry for the second skirt.  The blue band is fabric leftover from the contrast fabric on Jen's dress - nice to get to spread that around!


I now have about three large bags filled with upholstery scraps and swatches that I have gotten for free from interior decorators and furniture re-upholstery shops.  The swatches seem to come in three sizes - large, medium, and small.  I'm saving the large pieces for one of my handbag designs and the small ones are perfect for the wallet, so I've been wondering what to do with the medium pieces.  Many of them have larger designs so I don't really want to cut them up for wallets.  In the middle of last week it came to me and I had to try it out immediately. 


So now I have the zippered upholstery clutch!  This clutch uses up almost all of two medium sized swatches and keeps the print intact.  I use a fancy swatch for the exterior and the wristlet and a plain swatch for the lining and the pocket.  There's a magnetic snap on the outside to keep it folded when you are carrying it about.  The interior pocket took some creative thinking to figure out.  I didn't want to do a zippered pocket even though I like these a lot - I wanted something quicker.  And I didn't want to use a magnetic snap because I imagine that most gals will use the interior pocket for a credit or ATM card so that they don't have to take their whole wallet out.  Then I remembered the little pockets that are in my running shorts.  They have a flap that keeps my keys from jumping out when I run.  Like this:


The flap keeps money and cards in place should you accidentally turn your bag over of fling it about wildly on the dance floor.  I was able to cut and sew two of these in about 2.5 hours, and I think I can do it faster with some practice.


I'll be selling these at the Little Bits Workshop Urban Crafter's Trunk Show on Saturday, May 12th.


I have a bunch of sewing shows saved up to watch on our DVR.  Devon sometimes hints that maybe I should delete some of them to make more room for things like hockey and Archer, but I'm going to hold out, at least until football season starts.  My favorite show is It's Sew Easy, a public television show.  In one of the first episodes I watched, Tricia Waddell (founder and editor-in-chief of Stitch magazine) demonstrated how to add a peak seam to a skirt, and I've been wanting to try this ever since.  About a month ago I bought a piece of fabric from Hancock's remnant bin (this black & white print is from their Top Drawer line), and I immediately knew that this was the fabric for my peak seam skirt.  I bought the dark teal Petersham ribbon from The Sewing Place - they have a good range of colors and decent prices.


As you know, I am a reformed wearer-of-all-things-black and I love color (this has rubbed off on Cora - if I suggest a neutral item of clothing she says, haughtily, "I only like clothes with color.").  I think this technique is great for adding a flash of color to a more neutral print, or for bringing some stability to a print that might be a little too busy.  I get to show off my racing stripes when I go out for the evening with my friends Candice and Kristen on Saturday; now I just need to figure out what top to wear!

That's if for the week.  This week I want to get Marides' skirts ready for a fitting and a couple of MaiseyBelle bags made.  Oh! And I'll likely post a tutorial on how to make a deeper cowl neck top, so come back for that at the end of the week.  I haven't decided on my personal project for next weekend, but I might make myself a corsetted pencil skirt, and if I do that I'll take pictures for a tutorial.

Onward, Ho!