The thoughts, sewing projects, and fabric oglings of a dedicated sewist.

Showing posts with label draft cowl neck. Show all posts

Comfort Sewing: Something Easy, Something Magenta

5/27/14
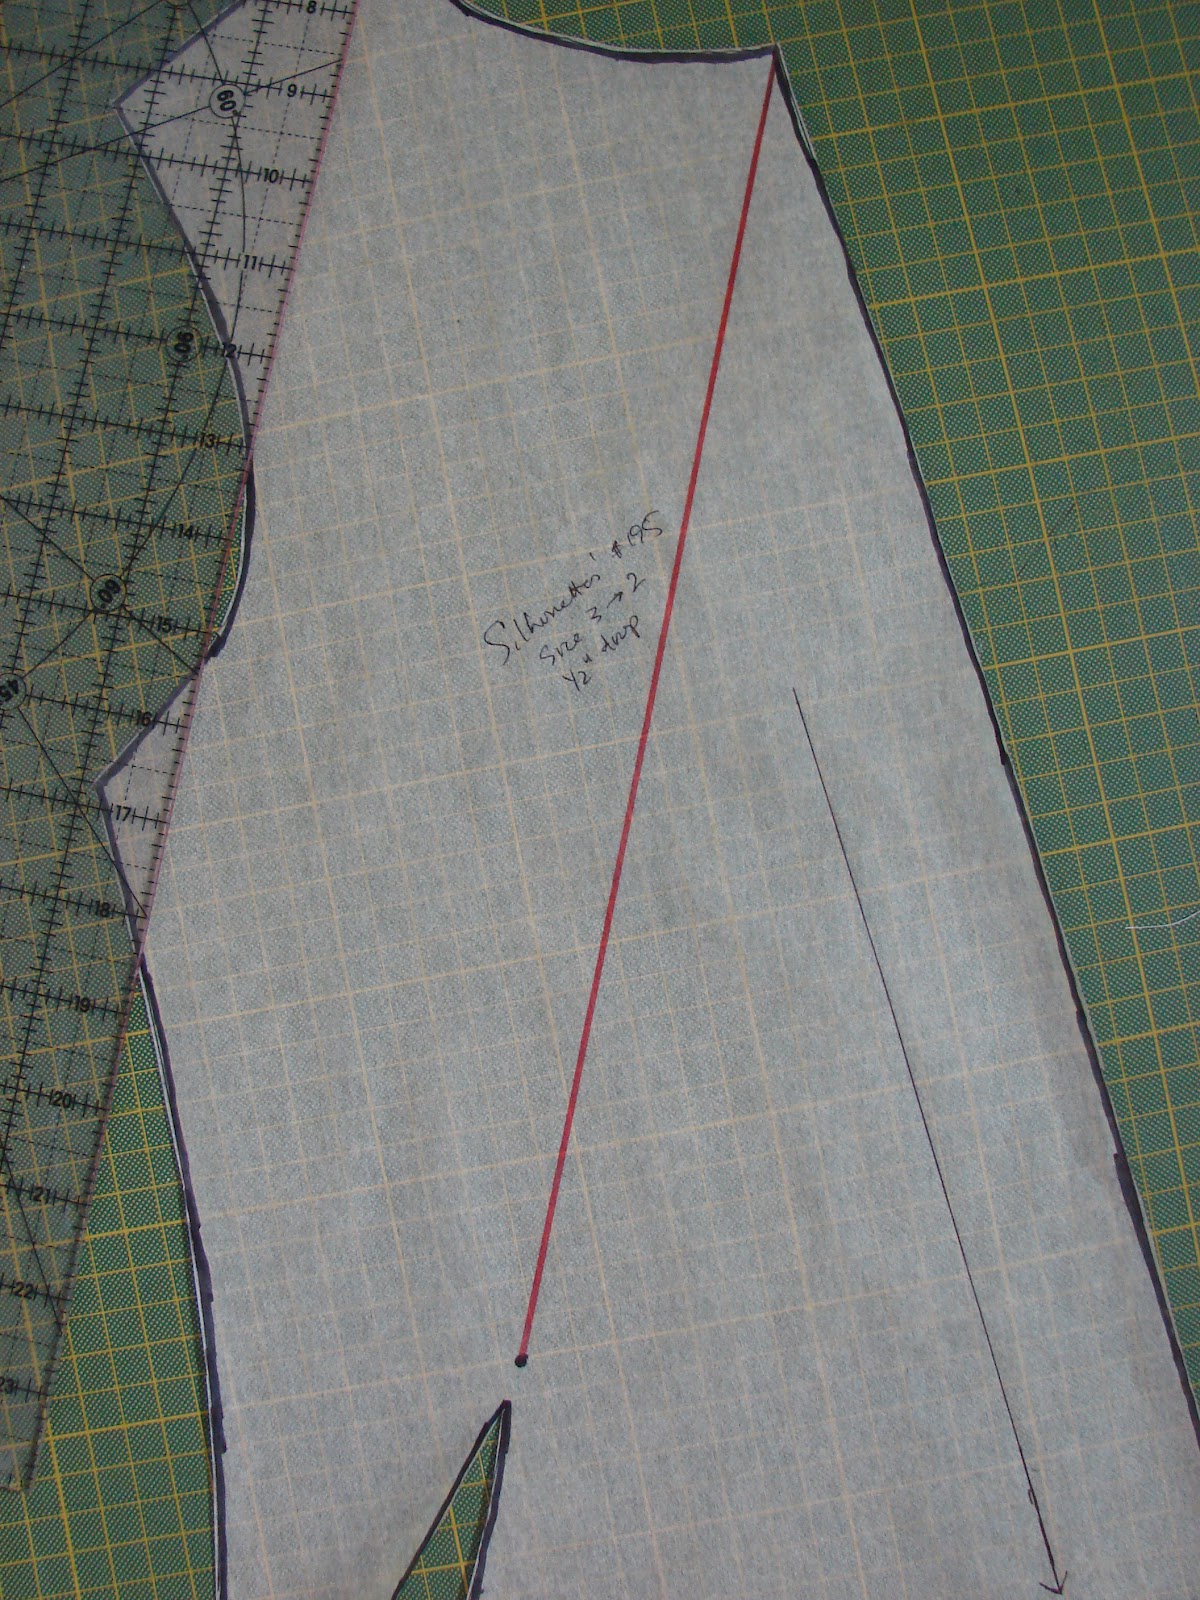
After the Elisalex finale, I needed something easy to make this weekend. I returned to a TNT, a deep cowl neck top hacked from Silhouette Pattern #195. If you want to hack something similar, please see my tutorial on how to draft a deep cowl neck. It's easier than you think!

The pattern piece for this top is one of those odd shapes that you get after some liberal slashing and spreading. I lengthened my original top by 1 inch, did a bit of shaping in the armsyche, and cut it with only a 3/8" facing (not the 3" shown in the original pattern piece).


I also cut an inner lining/facing that stops 4 inches under the arm.


I didn't have enough fabric to make the facing from the same fabric, so instead I used a scrap of magenta jersey left over from this dress and this top.


So I get a peek of magenta showing around the neckline on this super soft jersey from Gorgeous Fabrics (and BTW, I know I go on and on about how much I like the fabric at GF. I should mention that I'm not sponsored by GF nor I am affiliated with them in any way - I just love Ann's eye for fabric). This color combo is now out of stock, but there's still a blue version, which I also almost nearly purchased.

This was a great project for a lazy Memorial Day weekend!


Next up is a dress hack of this hack. If all goes well, it will also be reversible!

Free Sewing Tutorial: Drafting a Facing for a Cowl Neck Top

9/25/12
Now that it's fall here in the Midwest, I'm in the mode of making some longer sleeve knit/jersey tops  I have a couple of tutorials that give instructions on how to draft a basic cowl neck jerey top (see here and here).  With my first few cowl necks, I was satisfied with a simple hem or leaving the cowl neckline serged, but recently I've wanted a more finished look.  This tutorial will teach you how to add a self-facing to your cowl neck pattern, so that you can't see any stitches around the cowl.

You will need:
*cowl neck top pattern
*paper
*pencil, pen
*ruler
*tape

Here's an example of what your cowl neck pattern will look like WITHOUT a facing:


The first step in creating a facing is to tape some paper to the cowl neck line, so that you can extend it.

Next, draw a line 2-3 inches above your cowl neck line.  Angle the edges so that it it is a mirror image of your original cowl neck.  It will look like this:


Cut out the front of your top as you normally would.  To sew your top, fold across the neckline at the extention that you made with wrong sides together (wrong side of facing against wrong side of fabric).  When you attach the front of the top to the back of the top at the shoulders, you'll have a double layer of fabric on the top front and a single layer of fabric on the top back.  It will look like this after you've sewn it together:

Inside cowl neckline (front)

Cowl neck from right side


For this top, I used ponte knit fabric (thicker, more stable) that I purchased at Hancock Fabric's in a sale (I think their ponte knit is still on sale).  Fabric.com, GorgeousFabrics.com, and MoodFabrics.com all have a good selection of ponte fabric, mainly in solid colors.  I wanted longer sleeves for it, so I used the sleeve piece from my Silhouettes Pattern #195 and shortened it to bracelet length.   I finished the edge of the back neckline with 5/8" fold-over elastic (I pulled it slightly as I attached it to the neckline with a zig-zag stitch - I find that pulling it slightly stops the back neck from gaping).  I originally recommended cutting on the top on the bias to make the neckline nice and drapey, but this weekend I experimented with cutting it out on the straight grain and it worked just fine. To cut the top out on the straight grain, you'll need a fabric that is nice and drapey to begin with, but most knits/jerseys are plenty drapey.  Here's how it turned out:


I made a pencil skirt with the same fabric (not to be worn together - THAT look was a freaky visual disaster!) and I'll post about that later this week.  Let me know if you have any questions about the facing and I'd love to see pictures if you try this tutorial!  Email them to poldapop@gmail.com, and I'll add them to the post with a link to your blog (if you have one).  Here's one that Diya at The Hobby Harbor made recently:

Pinned Image


Cheers!

Free Sewing Tutorial: Draft a deep cowl neck top

5/3/12
UPDATE: I've added a post about drafting a facing for this cowl neck here.

My tutorial on drafting a high cowl neck top has had a lot of pageviews in the last week (this always makes me happy).  So at the request of at least one reader (see? that's all it takes with me!), I'll show you how to draft a cowl neck top starting with a pattern that has a dart.  This will produce a deeper cowl neck like this one:


I started with Silhouettes' Pattern #195 as I have already made alterations to the pattern for a good fit (changed shoulder slope, took in waist/hip as they are smaller size than my shoulders).  It has a French dart, but these instructions should work regardless of where you dart is placed.

And I need to give a big thank you to Peggy Sagers for her help in figuring out how to draft this pattern (from Silhouettes).  I took a couple of classes with her at the sewing conference I went to recently (Original Sewing and Quilting Expo) and she encouraged people to contact her with questions.  So when I was trying to figure out what to do with the dart, I emailed her.  Within a couple of hours I got a very helpful response.  And this was on a Sunday.

Materials
*1 - 1.5 yards of drapey fabric with stretch (jersey, knit, stretch charmeuse, maybe even stretch poplin)
*Tracing paper (I use Bienfang Canary Sketching and Tracing Paper, the 50 yard/24" roll)
*Clear ruler
*Top/bodice pattern with a dart


Step 1: Move dart to neckline.
Trace your orginal pattern onto another sheet of tracing paper as you'll need to do a lot of cutting.  To move the dart to the neckline, draw a straight line from the dart point to the center front neckline.


Now cut along this line until you are about 1/8" away from the dart point (this will be your "hinge"). 


Now close and tape the orginal dart which will cause the pattern to spread at the new dart point.  It should look like this:


All right!  Step 1 is done.  You have moved a dart!


Step 2: Cut & spread neckline
Draw a curved line under the neckline, 1.5 inches down from the original. Cut along this line until you are about 1/8 inch from the shoulder line.

Draw two lines that meet at a right angle on a new sheet of paper. Place your cut pattern piece along the top line on this piece of paper. Spread the neckline so that both points touch the top line. Angle the remaining bodice so that the bottom center front corner touches the side line. Tape into place.  If that sounds confusing, it isn't - I think it's just easier to understand with a picture:


Smooth out the angle created at the shoulder line:


(Please ignore the second layer of pattern - that was my first try and it wasn't correct so I just taped take 2 over the top.)

Step 2, check!


Step 3: Turn half pattern into full pattern
You need to cut on a bias for this design, so you will need a full instead of a half pattern. Take a big piece of tracing paper and draw a T with lines meeting a right angles. Trace your half cowl neck pattern onto one side of the T and then flip and trace it onto the other. It should look like this when you are done:


I know this looks like something that would never fit a human body, but trust me, it will work!  And please ignore the wide band in the middle - I had to tape two pieces of tracing paper together to get one that was big enough.

Good work - the hard parts are all done!

Step 4: Place and cut your fabric
Spread out your fabric. Place the front pattern piece on the bias and the back pattern piece on the straight grain. It will look like this:


Cut and sew the top as you would normally.  You can serge the edges, turn them under by 1/4" and topstitched them into place or leave them just serged for an edgier look  You can add any kind of sleeve or even a hem band.  This top will fit and look great.  Devon calls this my sexy top and looks suspicious when I wear it out with friends!